How to Convert OLM to PST Manually? – Complete Tutorial
Christopher Plummer | April 5th, 2022 | Data Conversion, Outlook
Summary: This technical guide will show you the best way to convert OLM to PST manually. Both file formats are very popular as they are part of Microsoft Outlook. There are some users who want to shift data from Mac Outlook to Windows Outlook. In order to do that, you have to change .ost file into .pst format. Let’s begin this article and find out the free and manual way to convert olm to pst.
Quick Approach: Trying to find a quick and easy way to convert OLM to PST file? If yes, then download this free Advik OLM to PST Converter tool which helps you to export OLM to PST without investing much efforts.
Now the question arises how to convert OLM to PST manually. Well, there are many methods to do this conversion process. But as a helper to our users, our first priority is to clear up your confusion about best practices. We’ll guide you through the free and safe solutions that no one can tell you.
Reasons to Convert OLM to PST File are as Follows
Converting email file format is a difficult task for everyone until they find a reliable solution for it. So here we have excellent methods to export OLM file to PST. Let’s go through some of the reasons responsible for OLM to PST conversion.
- The most important factor is that the PST file is most commonly used than the OLM file of Mac Outlook.
- The various features available in Outlook for Windows are not provided by Outlook for Mac.
- When users are thinking of switching from Mac OS to Windows OS. as the demand for Windows operating systems increases.
How to Convert OLM to PST Manually?
To ensure the efficient functioning of this method, you need to follow strategic and proven steps. Here is the list of steps that you need to follow to convert OLM to PST manually.
The essential factor you should consider before proceeding is that you must have both Mac Outlook and Windows Outlook installed in your system in order to carry out this process.
Step 1: Setup Gmail IMAP Account in Outlook for Mac
1. On your Mac OS, open Outlook and go to Menu >> Tools >> Accounts.
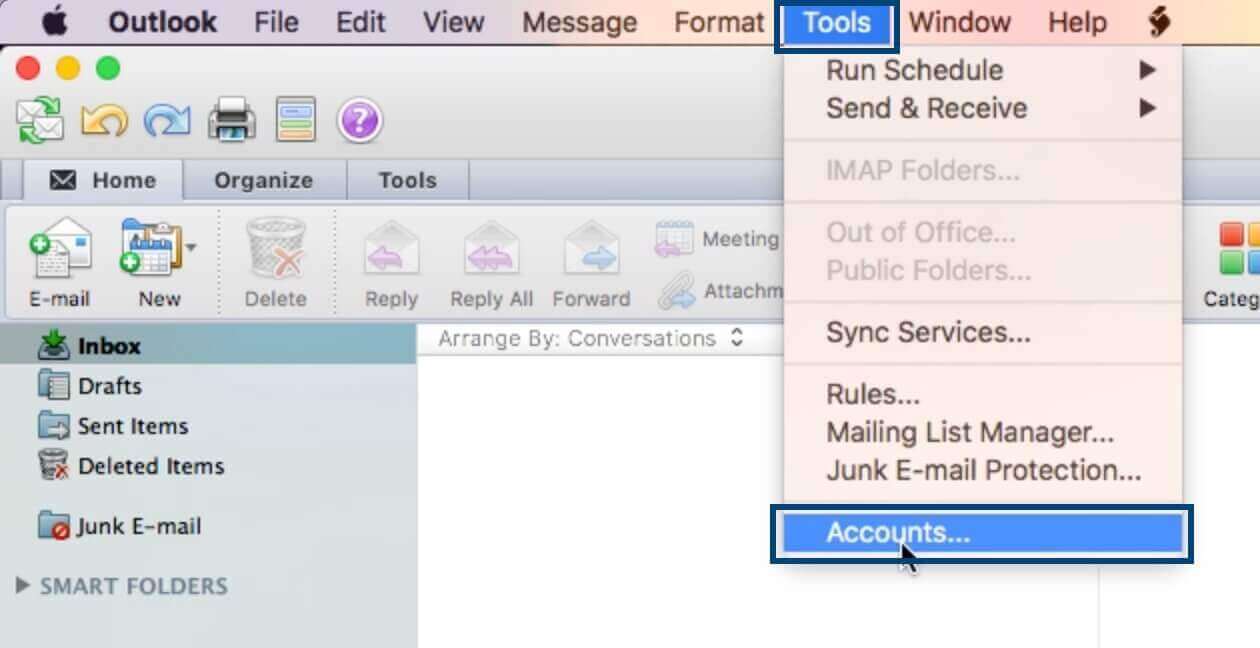
2. Enter your email address and password and then click the “Add Account” button.
3. On the Mail tab, you can configure and view your IMAP Gmail account.
Users must create a Gmail label after completing these sub-steps in order to synchronize their Outlook for Mac and Gmail account.
Step 2: In the Gmail Profile, create a Label.
- To begin, log into your Gmail account. Then, on the right side, click the gear icon. Then select the Settings option.
- Select the label, then click the Create New Label and Show button.
- Now, Click Send / Receive in your Mac Outlook.
Step 3: Move emails from Mac Outlook to IMAP Gmail Account
- Right-click on the mailbox item you want to transfer to Outlook for Windows in Outlook for Mac.
- Then select Move > Copy to Folder from the menu.
- Click Copy after typing the name of your IMAP folder.
To update your mailbox, go to Gmail and click Send/Receive folder or Refresh. All of your copied mailbox data has now been synced to the Gmail mailbox folder.
Step 4: Configure Gmail account with Outlook for Windows
1. Start Outlook in your Windows OS.
2. Select File from the menu tab.
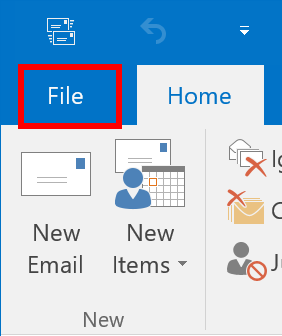
3. Choose, Add Account from the drop-down menu.

4. Click “Connect” after entering your Gmail address.
5. Again, enter your password and tap “Connect”.
Outlook will automatically configure Gmail settings and it will add your account into it.
6. After that, click Done.
That’s it, Gmail account is now accessible in Outlook for Windows.
Step 5: Export PST file from Windows Outlook
1. First of all, go to File> Open & Export> Import/Export.
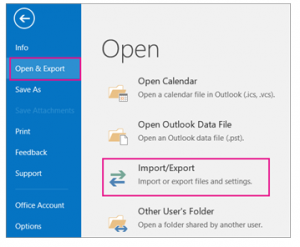
2. Choose Export to a file from and click the ‘Next’ button.

3. Choose Outlook data file(.pst) from the options, and click ‘Next’.

4. Click ‘Include Subfolders’ after selecting the mail folder that contains messages copied or synced from Outlook for Mac.

5. Browse a saving location for the new PST file and click ‘Finish’.
Limitations of Manual Solutions:
There are few common drawbacks of manual solutions that you need to see before you choose any method, it is essential to complete the whole task in stipulated time.
- It’s a lengthy procedure that takes a lot of time of users.
- The manual process may be problematic if you have a large amount of data.
- Users with only highly advanced technical skills can tackle this process which involves multiple steps.
Professional Solution to Convert OLM to PST File
As manual methods have numerous limitations, then the only option that left with us is to use an automated tool. Advik OLM to PST Converter is one of the best tools for converting OLM files to Outlook PST file in more easy way. It is especially designed with advanced algorithms that allow the conversion to be completed in a short amount of time.
The software can also helpful for you if you want to open OLM file in Windows Outlook. This tool also allows you to convert OLM in 30+ file formats such as PST, MBOX, EML, EMLX, CSV, PDF and many other.
Steps to Convert OLM to PST using Automation tool are as follows;
1. Install and Run OLM to PST Converter in your system.
2. Click, “Add File” or “Add files having OLM files” to upload OLM files into the software panel.
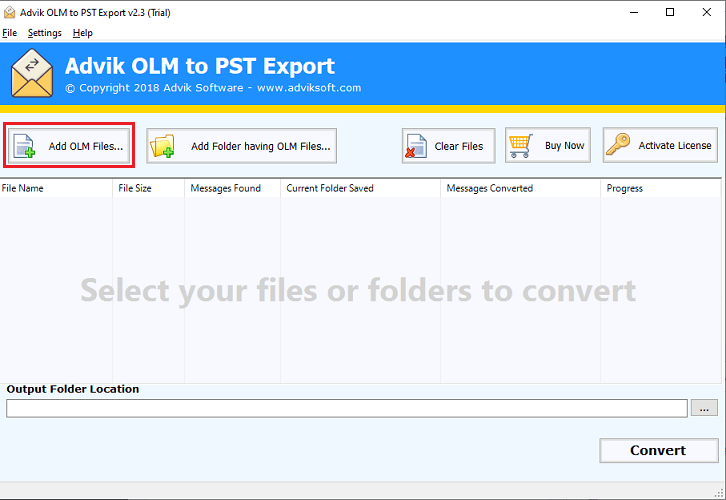
3. Tap on the “Output folder location” to choose desired destination path to save resultant PST file.
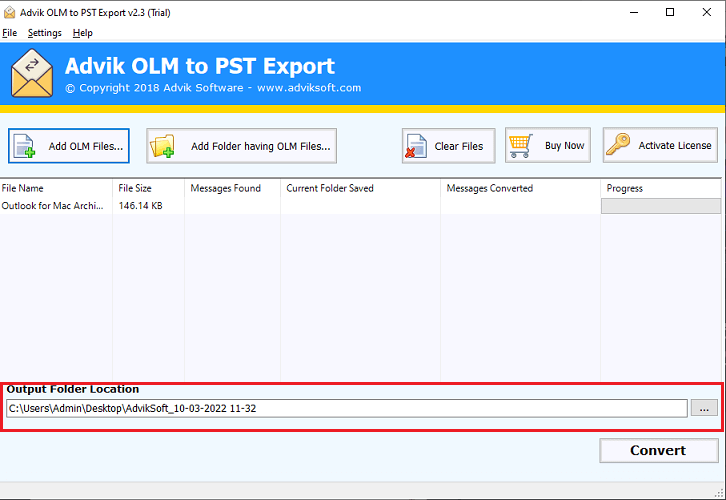
4. Finally, click on the “Convert” button to start file conversion process.
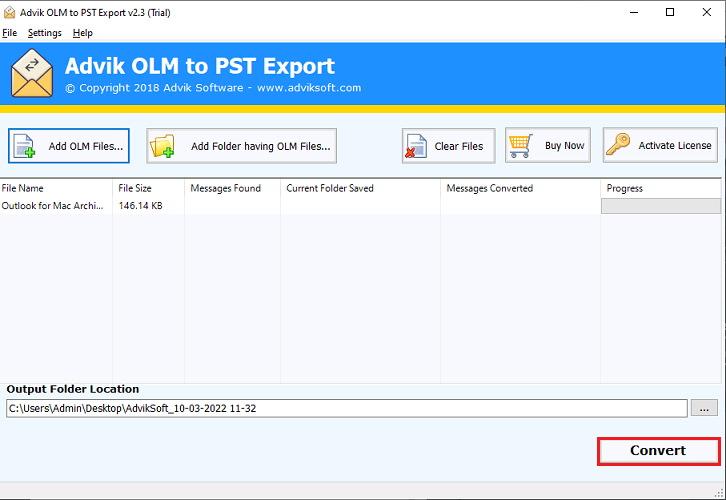
Wait for a while, and you will be notified through a log text report and also you will be automatically redirect through your chosen location where your PST file has been downloaded.
Final Words
In this article, I have described how to convert OLM to PST manually. The solutions to this query have been explained very effectively and efficiently. Since the manual technique has some major disadvantages, we have provided an alternative solution to overcome these challenges to save your crucial time. I hope we did our best and found the reliable solutions you were looking for.


