How to Extract Email Addresses from Office 365? – Updated 2024
Christopher Plummer | February 3rd, 2024 | Data Backup, Office 365
Summary: Are you looking for a way to extract email addresses from Office 365? If so, continue reading this article to learn how to save Office 365 email addresses to an Excel spreadsheet. To export email addresses from Office 365 to a CSV file format, we have provided two best methods after much research on the subject. As this is our first priority to offer our users the best and easiest approaches to solve their problem. Go through this blog for the complete process.
How to Extract Email Addresses from Office 365?
This process is divided into two main steps so that you can easily identify the procedure involved.
Step 1. Set up Office 365 account In MS Outlook
If you currently have a Microsoft 365 account set up in Outlook and want to add another Microsoft 365 or any other POP/IMAP account, follow the instructions below:
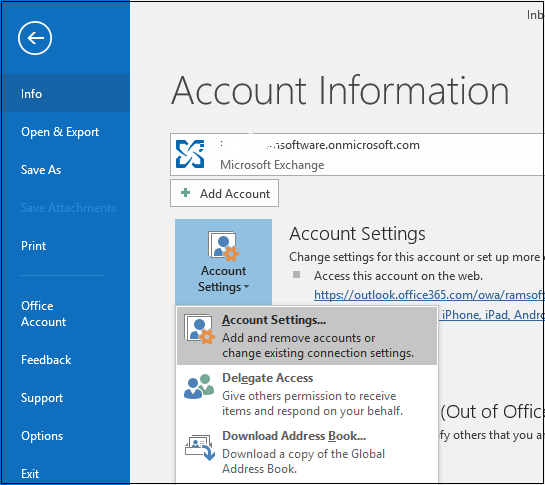
1. Choose “Account Settings >> Account Settings” in “File” tab in MS Outlook Application.
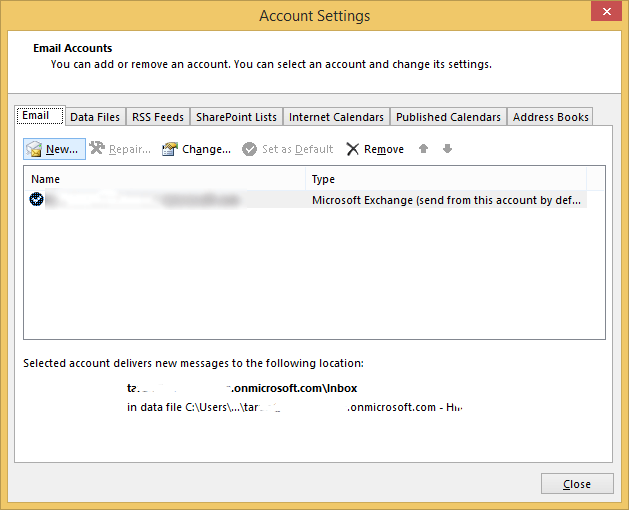
2. On the screen, a new tab will appear in which select “New” and proceed.
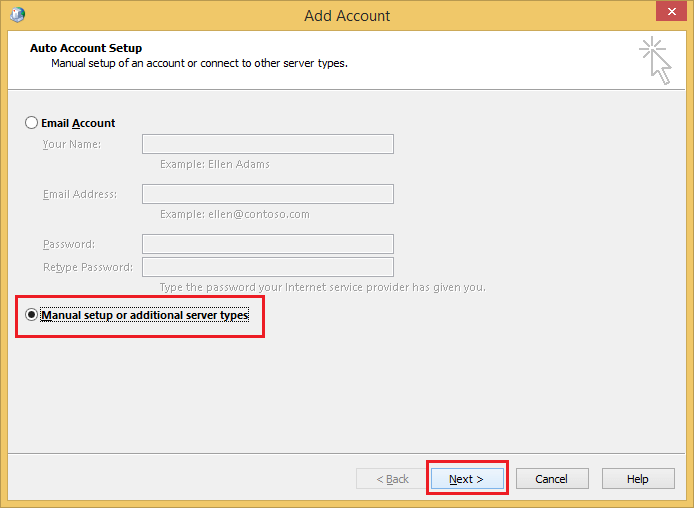
3. Select “Manual setup” and click “next” to continue.
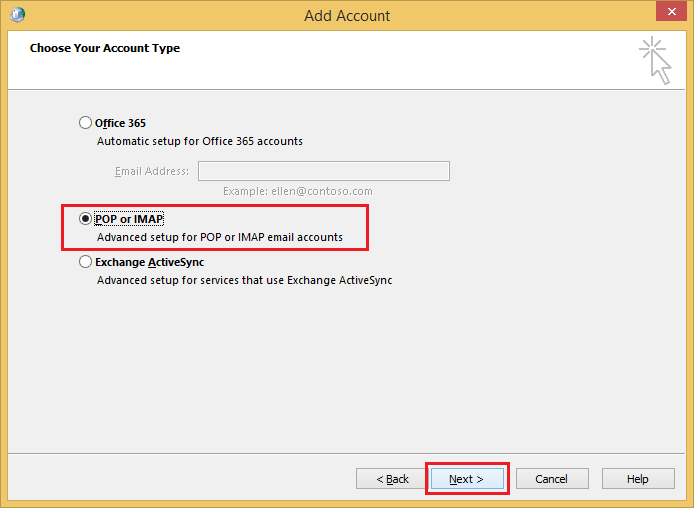
4. Select “POP or IMAP” from the opening dialogue and click “Next”.
5. Fill in the appropriate fields, then go to “More Settings” to manually input the server information, then click “Next”.
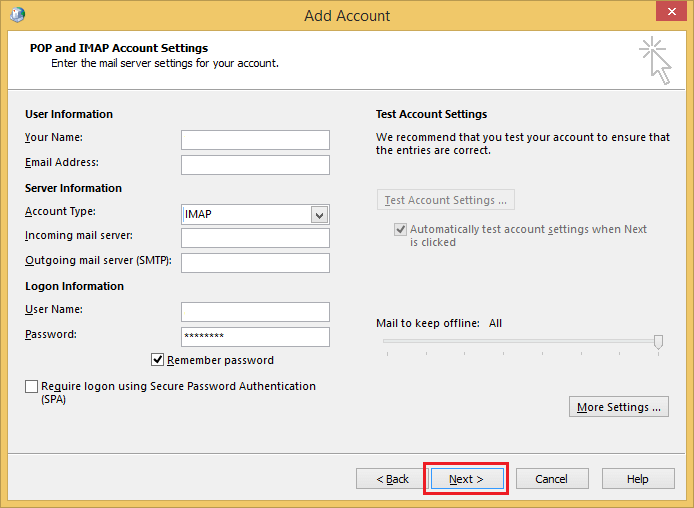
Note: Setting up an IMAP account with Outlook takes a long time. Go to Outlook once it’s finished and restart it.
Step 2. Manually export a file of contacts from Outlook
1. Select File from the File menu in Outlook.

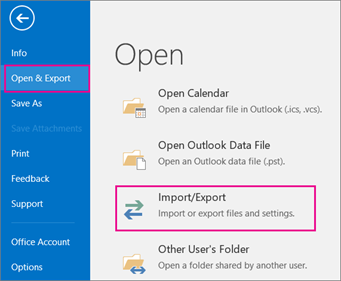
2. Click on Open & Export >> Import/Export.
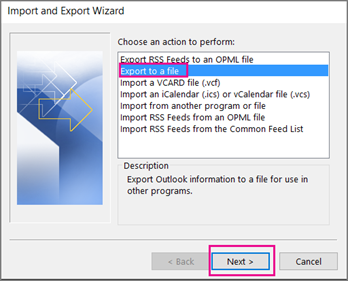
3. Select Export to a file from the drop-down menu.
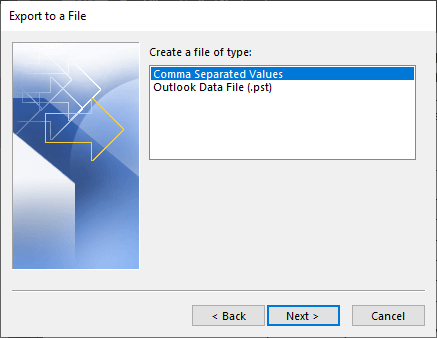
4. Choose “Comma Separated Values” to export data.
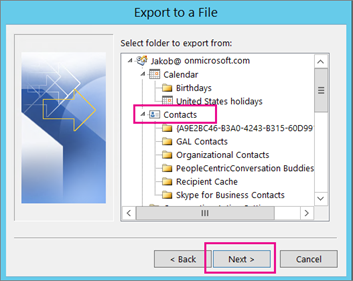
5. If necessary, scroll to the top of the Select folder to export from Office 365 mailbox and select the Contacts folder under your account and press “Next”.
6. Browse the location, give your file a name, and then click OK.

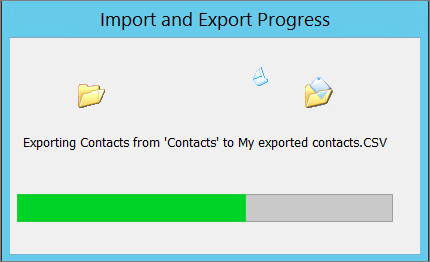
7. Press “Finish” to begin exporting your contacts right away. When the export procedure is complete, Outlook does not display any messages, but the Import and Export Progress box disappears.
8. Open Excel and locate the new.csv file on your PC.
Limitations of the Manual Methods:
- It is a lengthy and consumes a lot of time.
- It does not provide any filter option to export items.
- The above method won’t work if Outlook import export option is greyed Out.
- This method requires technical expertise. It could be difficult for non-technical users to operate it.
How to Export Email Addresses from Office 365?
To overcome the limitations of the above process can go with a solution which is simple and easy to use. Advik Email Backup Wizard is such an amazing tool to export Office 365 emails to excel. Also, you can extract email addresses from Office 365 to excel using same solution.
Steps to Extract Email Addresses from Office 365
1. First, Install and run this software into your system.
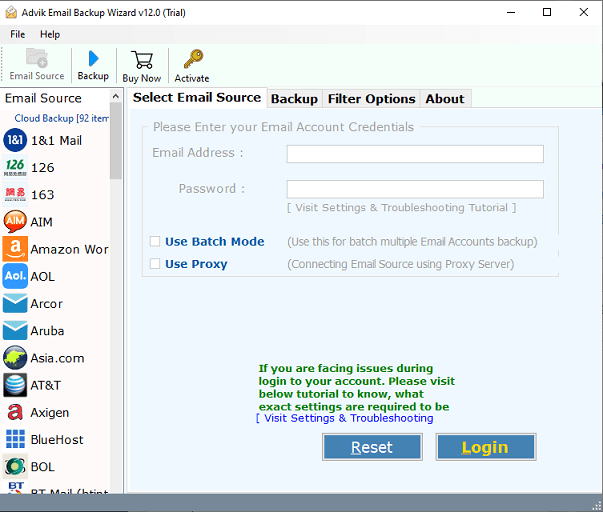
2. Now, Select “Office 365” webmail option from the “Email source” list which consists of around 70+ options.
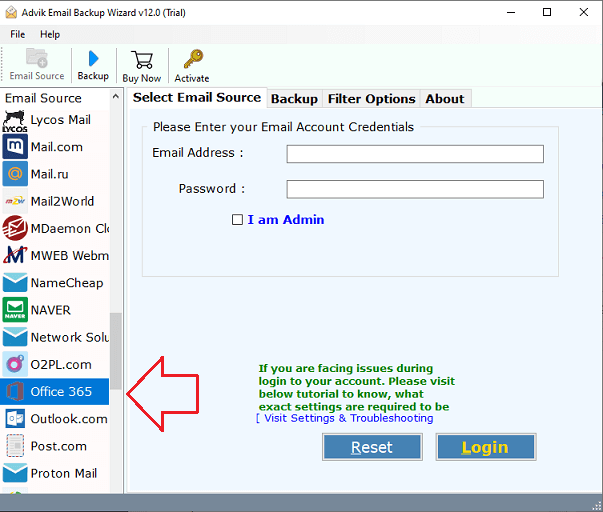
3. Enter your Office 365 email account credentials to connect with your account.
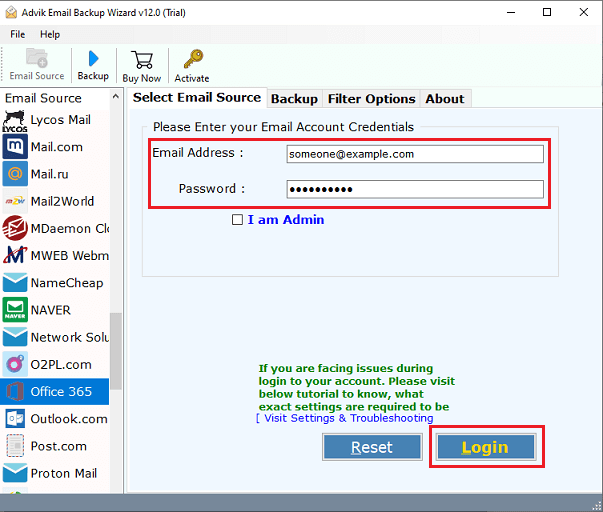
4. Choose the required email folders.
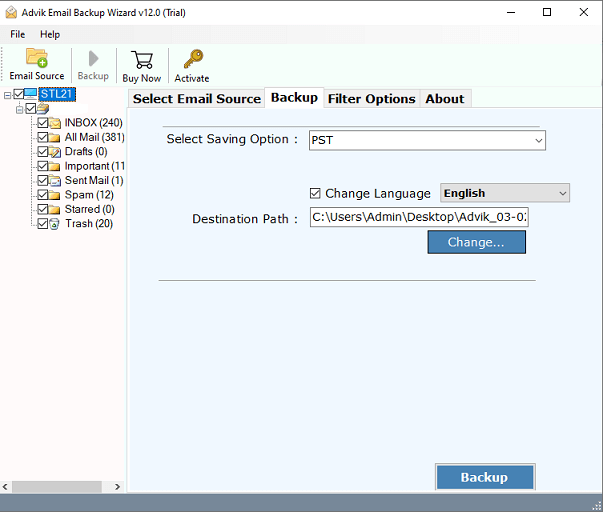
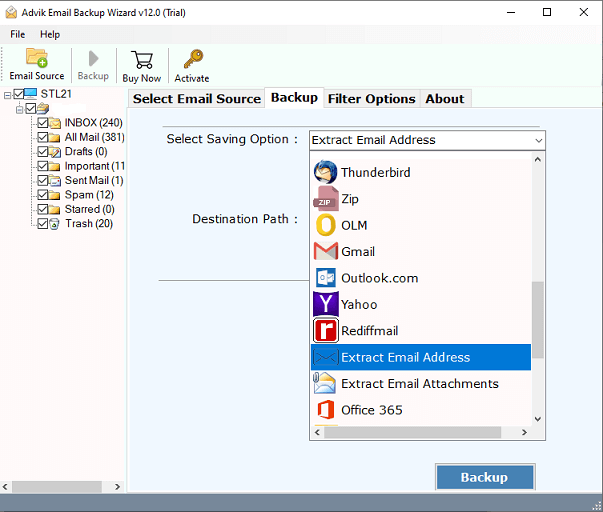
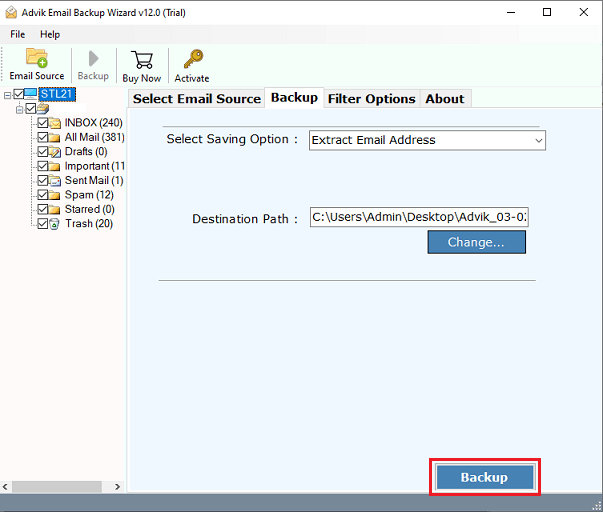
5. Now, Select “Extract Email Address” as a saving option.
6. Thereafter, Choose the “destination path” to save your resultant data file at your chosen location.
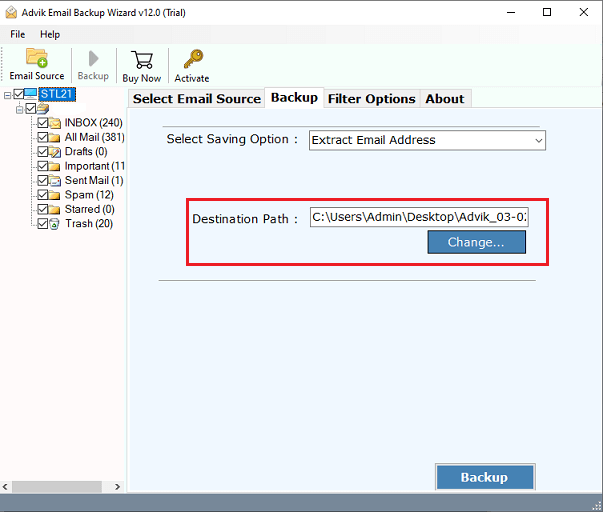
7. Click on the “Backup” button to start the extraction process.
Watch Video Tutorial
Conclusion
We’ve covered the entire procedure of extracting email addresses from Office 365 to Excel. The app also allows you to export multiple email addresses from multiple Office 365 accounts in one go. This application comes with advanced algorithms that allow you to easily export email addresses from your Office 365 account. However, we found a number of disadvantages with the manual method. For the hassle-free extraction process, we recommend users use the automated tool. It is proficient enough to handle such tasks with 100% accuracy and also delivers satisfactory results without any difficulties.


