How to Migrate Email from Opera Mail to Office 365?
Jackson Strong | April 26th, 2023 | Data Backup
Quick Summary: Learn how to export Opera Mail to Office 365 mailbox. This blog covers an easy and simple solution to migrate email from Opera Mail to Office 365. You can also opt for an automated tool to import Opera Mail into Office 365 directly. Go through this article to find out the issues faced by Opera Mail users and the solution to transfer Opera Mail emails to Office 365.
Opera Mail was an email client developed by Opera Software. It was initially a part of the Opera web browser but was later separated as a standalone application. As an email client, it allowed users to manage multiple email accounts, read and send emails, and organize messages into folders.
However, in 2016, Opera Software announced that it would discontinue development and support for Opera Mail. Also, it is no longer available for download, and users are encouraged to switch to other email services.
While, Office 365 is a cloud-based email service by Microsoft that allows you to manage your emails, calendars, contacts, and any other data on the cloud without any dependency on other applications.
Now, let’s move to know the benefits of exporting Opera Mail emails to Office 365 account. Then, after we will discuss methods to import Opera Mail emails to Microsoft 365.
Why Do Users Need to Migrate Email from Opera Mail to Office 365?
There are several reasons why users may need to transfer Opera Mail to Office 365;
- Office 365 offers a range of features and functionalities that are not available in Opera Mail.
- It has advanced security features that help protect users from spam, phishing, and other email-related threats.
- As, Office 365 is a cloud-based service, which means that it can easily scale up or down depending on the needs of the organization.
- Office 365 integrates with a range of other Microsoft tools such as Outlook, Skype, and OneDrive, which can help users be more productive and efficient in their work.
- It comes with comprehensive support from Microsoft, which means that users can access technical assistance and troubleshooting if they encounter any issues.
So, these were the advantages of using a cloud-based email service like Office 365 instead of an outdated Opera Mail email client application.
Now, if we talk about the methods to migrate emails from Opera Mail to Office 365, we don’t have any manual solutions. That’s why we need a professional approach to execute this process without any issues.
Professional Approach to Import Opera Mail Emails to Office 365
Advik MBOX Converter is designed with advanced algorithms to easily import mbox to Office 365. With this tool, users can also export Opera Mail mailbox to PST, EML, PDF, MBOX, MSG, DOC, HTML, and many other file formats with so much ease. This tool is preferred by most organizations to export large mailbox data with 100% accuracy. You can easily export Opera Mail emails to Office 365 with 100% accuracy.
One can use this amazing tool to also transfer Opera Mail to Gmail, Yahoo Mail, Thunderbird, Windows Live Mail, Zoho Mail, Yandex Mail, IMAP, etc. It is an easy-to-use application that can be easily accessed by technical and non-technical users.
Download the FREE Trial Version of this handy tool to check its efficiency;
Steps to Export Opera Mail Emails to MBS File
- Open Opera Mail and right-click on the mailbox folder you want to export.
- Select the “Export” option from the context menu.
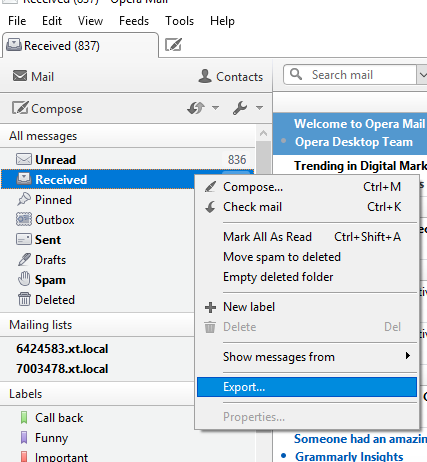
- Choose the location where you want to save the exported MBS file.
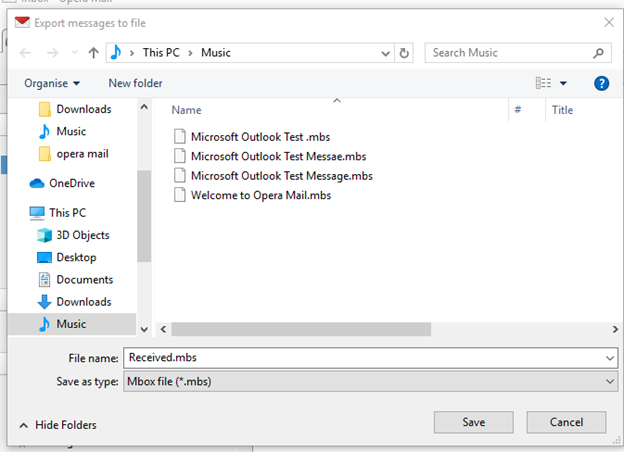
- Click on “Save” to start the export process.
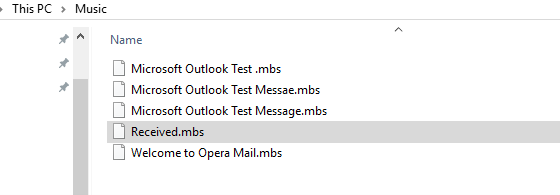
- Wait for Opera Mail to export the selected mailbox folder to the MBS file.
- Once the export process is complete, you can find the MBS file at the location you selected.
- Now, select those MBS Files and right click on them and rename them as MBOX files.
After that follow the below steps to export Opera Mail emails to Office 365.
Steps to Import Emails from Opera Mail to Office 365
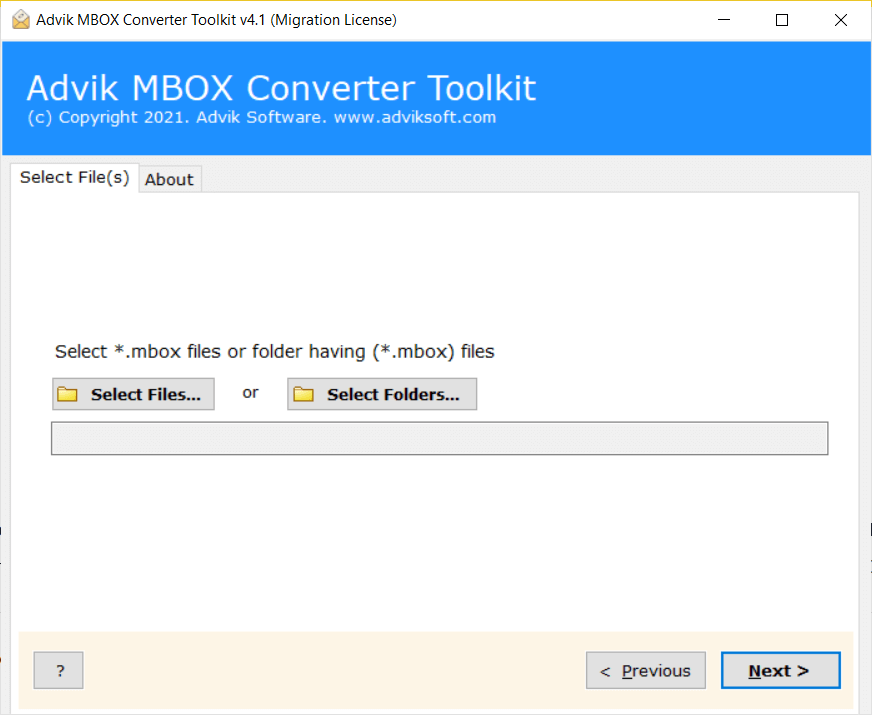
- Launch and Run Advik MBOX Converter Tool on your Windows PC.
- Now, choose a way to upload Opera Mail email files into the software panel; through Select Files or Select Folders option and press the Next button.
- After that, this tool will give a preview of all Opera Mail mailbox folders, select the required ones and click on the Next button.
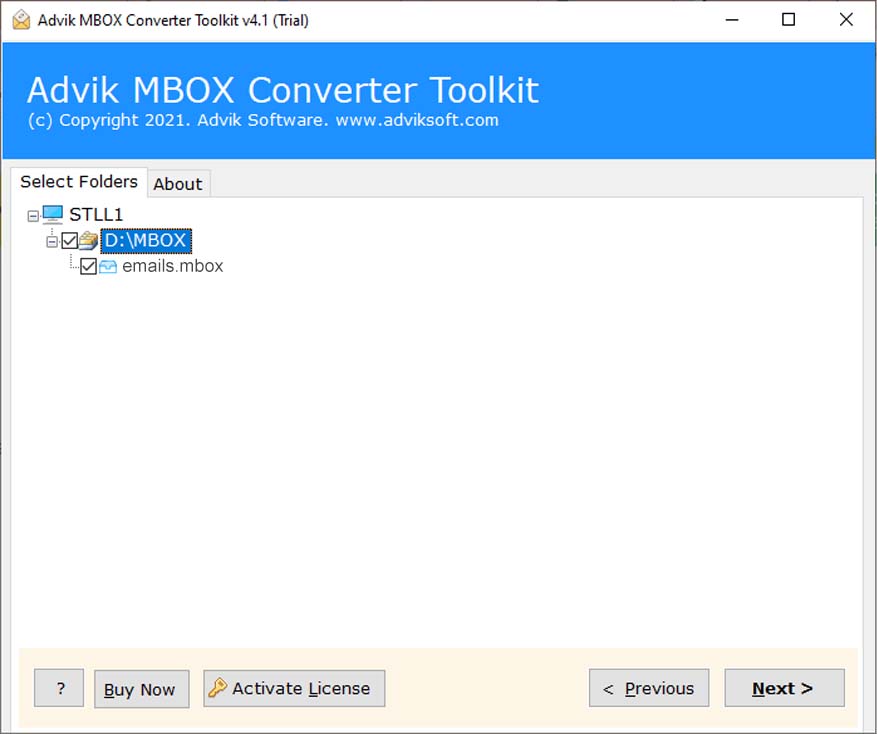
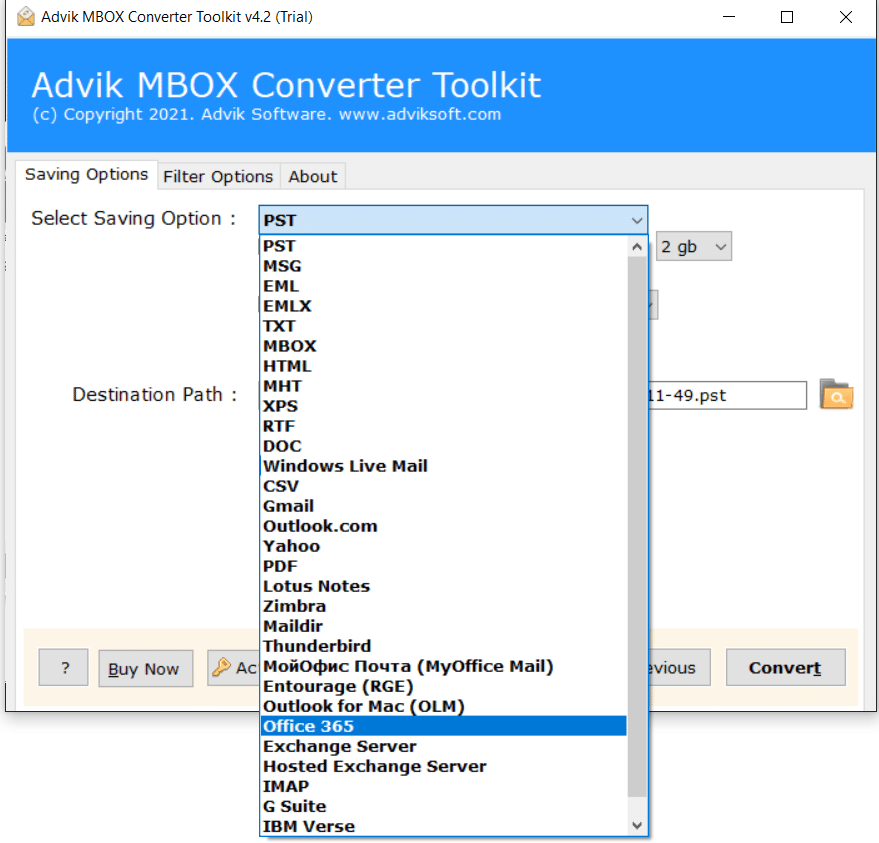
- Then, Choose Office 365 as a saving option from the list and click on the Next button.
- Now, a new tab from Microsoft will appear on your screen, enter your password for Office 365 account and click on the Sign in button.
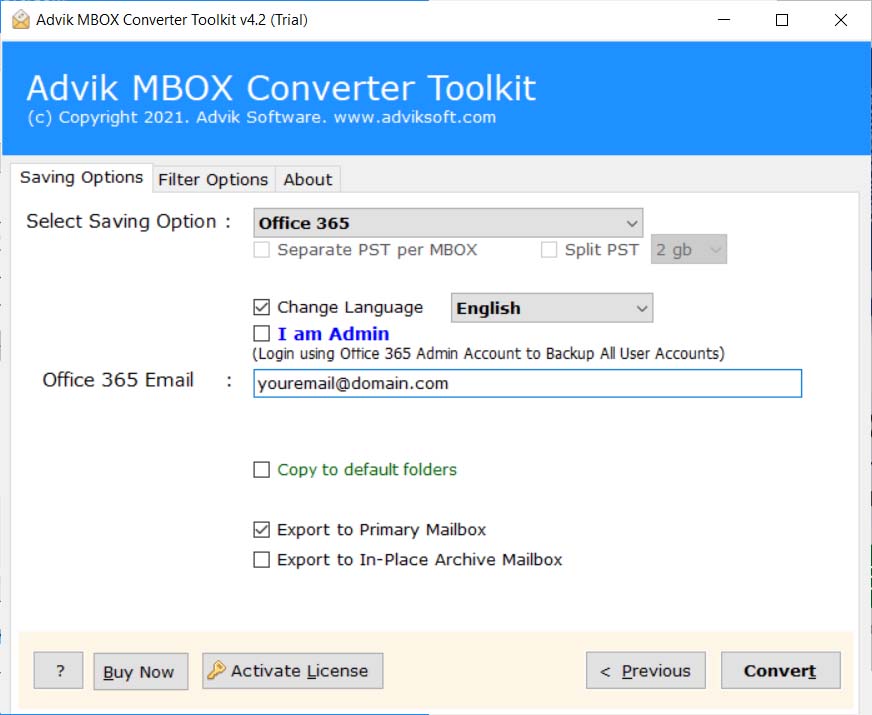
- In a few seconds, the tool will start exporting Opera Mail emails to Microsoft 365 account instantly.
Watch How to Transfer Opera Mail to Office 365
Key Benefits & Features of Advik MBOX Converter Software
Dual conversion options: Users can choose to manually select Opera Mail mailbox files or folders for conversion through dual ways. This feature will help users to import Opera Mail emails to Office 365 in bulk.
Preserve Email Elements: The tool maintains all email properties during migration, including email addresses, images, text formatting, and attachments.
Advanced Email Filter: The tool offers email filter options that allow you to selectively migrate Opera Mail emails to Office 365 on the basis of Date, To/From, exclude folders, include folders etc.
Maintain Folder Hierarchy: The application preserves the internal folder hierarchy during the email migration process from Opera Mail to Office 365.
Windows compatibility: The software is fully compatible with all versions of Microsoft Windows Operating Systems, including Windows 11, Windows 10, and many more.
Final Words
For migrating Opera Mail to Office 365, we have provided the most secure and easy solution. The method described in this blog is fully automated as you just need to upload Opera Mail emails and enter Office 365 account credentials and the rest of the work will be done by the software itself.


