How to Import EML to Windows Live Mail?
Margot Robbie | March 20th, 2025 | Import Emails
Summary: There are many users who are looking for a solution to open EML file in Windows Live Mail for a variety of reasons. If you are also one of them then this blog is helpful for you. In this article we will provide the two best methods to import EML to Windows Live Mail. Read the blog completely and accomplish this task easily.
EML is short for Electronic Mail Messages commonly consisting of email headers, text information, attachments, images, etc. It is used by many email applications to store individual email messages.
On the other hand, Windows Live is a part of Windows Live suite which was also introduced by Microsoft as a successor of Outlook Express and Windows Mail. Although it is a discontinued email client yet still used by many users for managing personal and professional emails. It allows users to manage multiple email accounts in a single platform.
How to Open EML File in Windows Live Mail Manually?
Follow the below-given steps to Import EML to Windows Live Mail.
1. Open the Windows Live Mail application on your system.
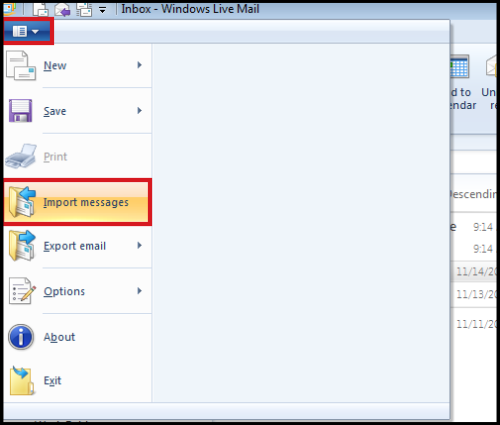
2. Go to File menu and click Import messages.
3. Click Browse and locate the .eml file and click Next.
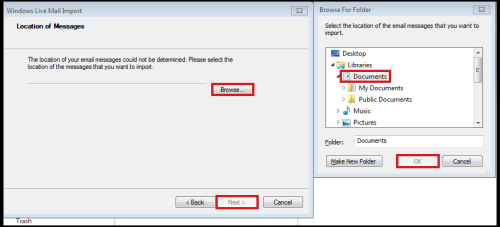
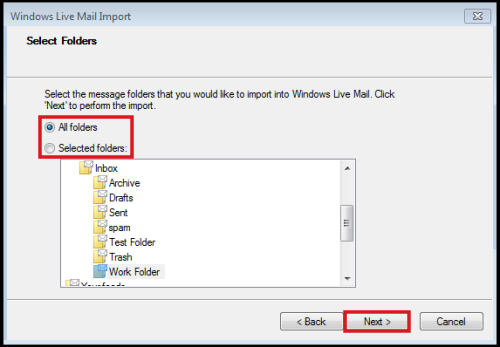
4. You can also select the Folder that contains multiple .eml files.
5. Click Finish to complete the process.
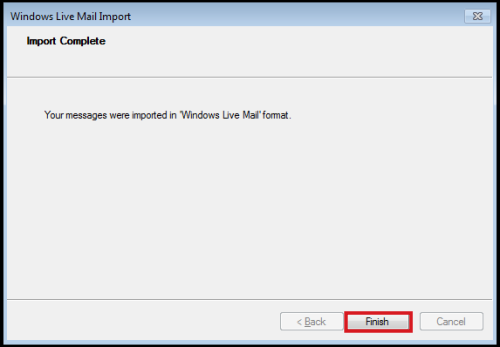
The emails will be imported into the Windows Live Mail.
How to Import EML to Windows Live Mail Automatically?
For secure and efficient import, try out the Advik EML Converter on your system. The tool allows you to transfer EML file created by any email client or server without any issue. It will save all your emails to the local storage in your system where Windows Live Mail app data is stored. With this utility, you can import multiple EML files to Windows Live Mail in a single attempt.
Hit on the below button to download this software for FREE.
Steps to Upload EML to Windows Live Mail
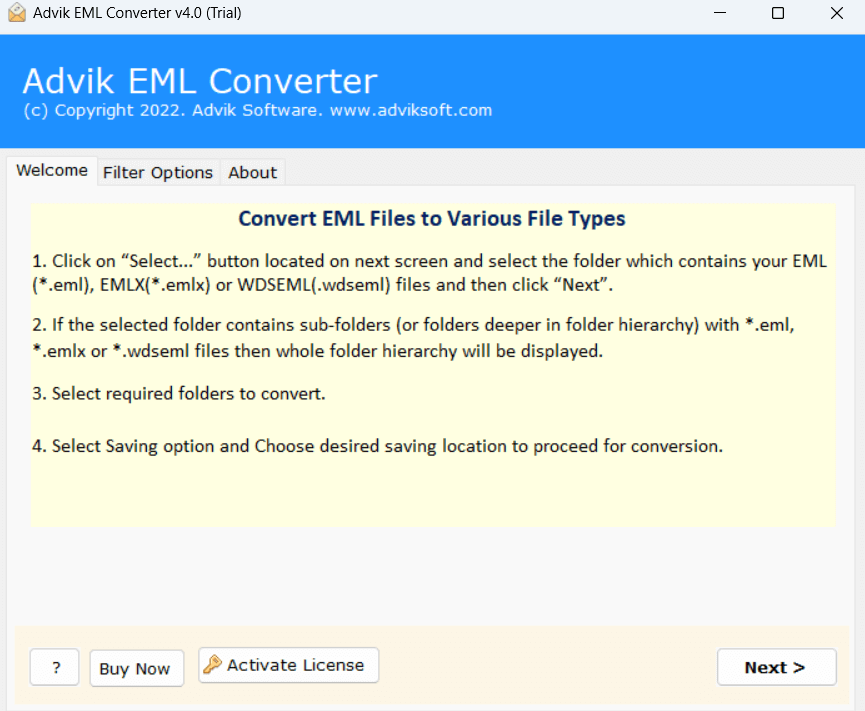
1. Run the tool on your system.
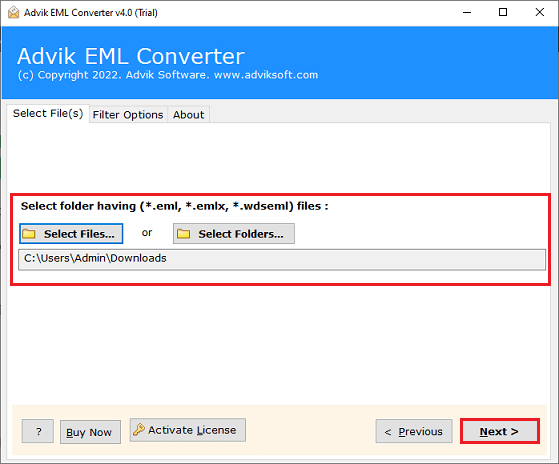
2. Click on Select Files or Folders to add EML files and click Next.
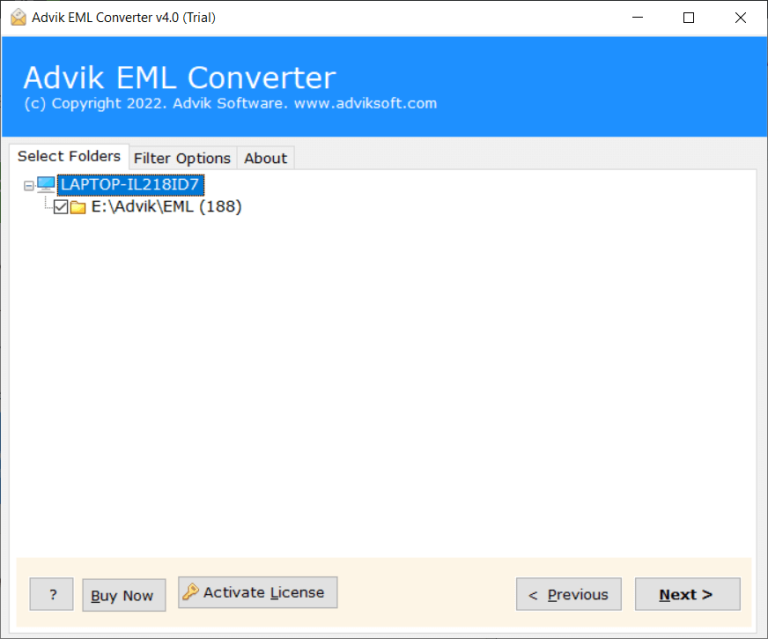
3. Choose the required files and press Next.
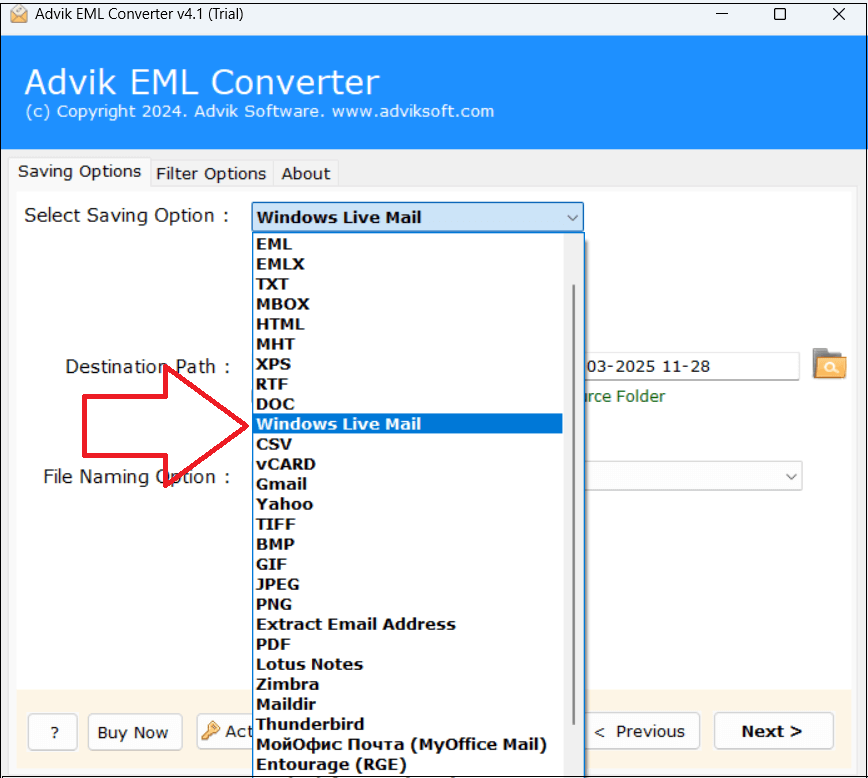
4. Select Windows Live Mail as a saving option.
5. Next, click Next button to begin the process.
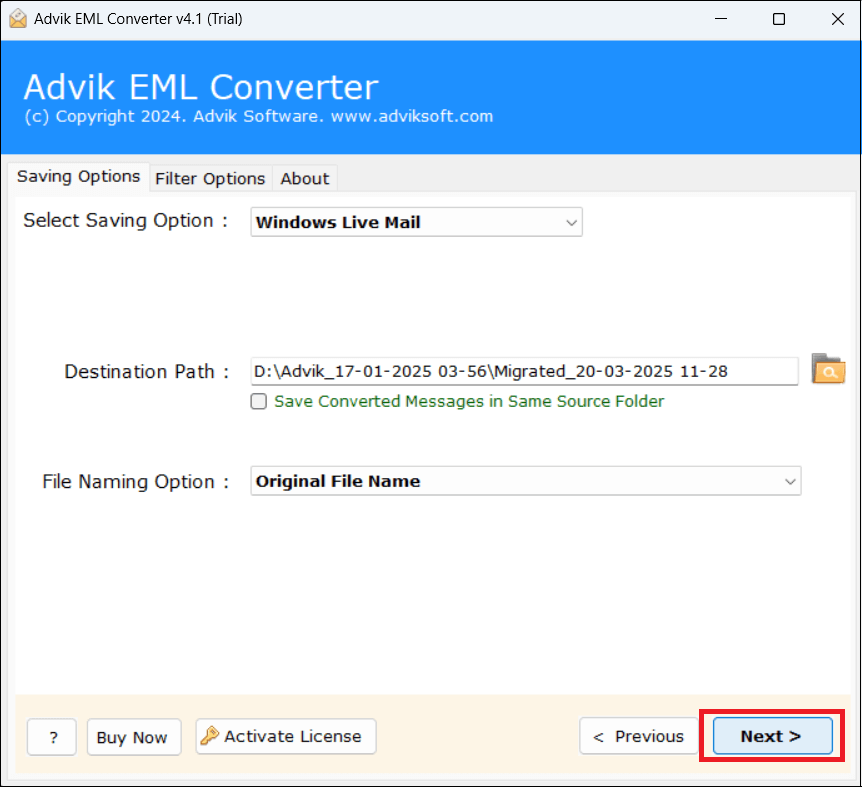
Done! That’s how you can easily transfer EML files to Windows Live Mail.
Benefits of Using Automated Tool
- Offer various saving options to convert EML into multiple formats.
- Directly import EML to any IMAP-based email service provider.
- Preserves email attributes and metadata properties while importing.
- Transfer EML files to Windows Live Mail in bulk.
- Simplified user graphical interface for all types of users.
- Compatible with all versions of Windows operating systems.
Final Words
Thus, how to import EML to Windows Live Mail blogs comes to an end. You can now understand how easy it was to open EML file in Windows Live Mail using the manual and automated solution. You can easily upload EMl files with a manual approach but if does not work then you can do it instantly with the above-suggested tool.


