How to Open PST file in Office 365 Account?
Jackson Strong | June 20th, 2023 | Data Backup, Outlook
Looking for a solution to open PST file in Office 365? This article explains the top methods to open PST emails in Microsoft 365 with the help of an easy and secure approach.
Office 365 is a leading cloud-based suite that offers a range of applications including Word, Excel, Team, and many others.
How can I open the PST file in Office 365? Well, to do that you need the Outlook application installed in your system. Then, first, configure your Microsoft 365 account with Outlook. After that use the Import/Export tool directly and upload the PST file to Office 365 mailbox.
Let’s check out the complete process in detail.
How to Transfer PST Emails into Microsoft 365?
Follow the steps to move emails from PST file to Office 365 account manually –
- Launch Outlook, click on the File >> Add Account
- Enter your Office 365 login details and click “Connect”.
- Outlook will attempt to detect the account settings automatically.
- If successful, you will see a tab where you need to enter your Office 365 account password and click “Connect”.
- Once the configuration is complete, click on the Done button.
- Outlook will now start synchronizing your Office 365 account and downloading your emails, contacts, and other data.
- Then, go to File >> Open & Export >> Import/Export.
- Here choose Import from another program or file >> Outlook Data File (.PST).
- Now, click the Browse button to locate the PST file. After that, choose the Office 365 mailbox folder to import it.
- Finally, select the option “Do not insert duplicates” to ensure that duplicate items are not imported. Click Finish to proceed with the process.
By following these steps, you will be able to open PST file in Office 365 easily. Although this approach completes the process, you can face some restrictions. If the PST file you are trying to open is corrupted or password-protected, then you will need a professional approach to move the data file.
How to Open PST File in Office 365 Email Account?
Advik PST to Office 365 Migration Tool is a versatile conversion tool designed for migrating PST files to Office 365 instantly. This tool offers convenience and ease of use with its user-friendly interface, you can easily preview specific files and folders before initiating the conversion process. This feature helps you determine which items are necessary to convert and which can be excluded. To provide greater control over the conversion process, the tool allows you to apply filters to the source data.
Follow the simple steps to move PST file to Microsoft 365 account –
1. Download the software on your Windows.
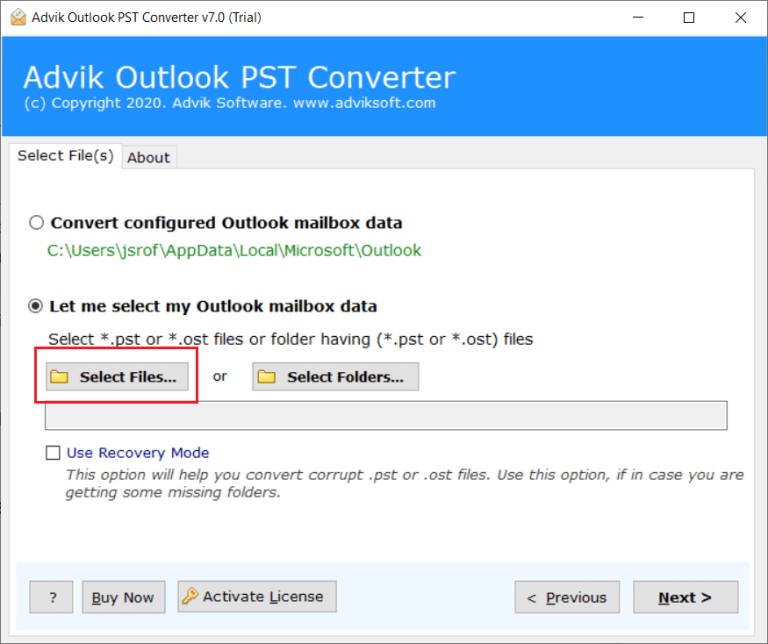
2. Now, click on the Select Files or Select Folders option and click on the Next button.
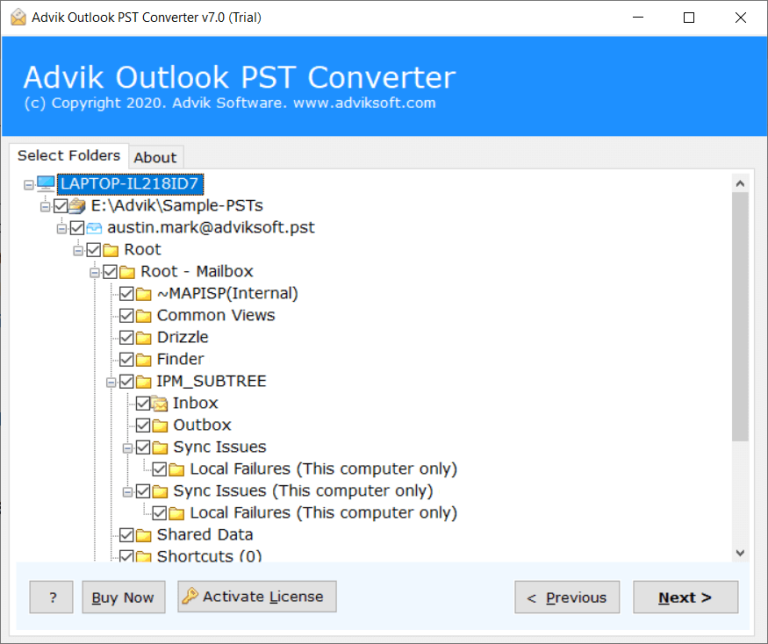
3. After that, check the mailbox file from the software panel that you need to view in Office 365 account.
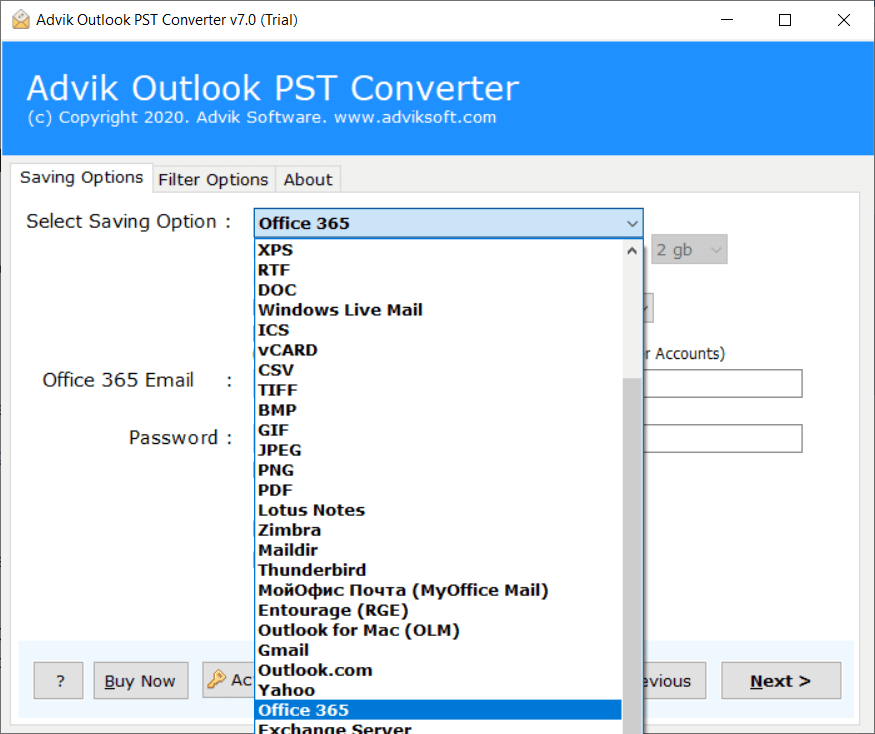
4. Then, choose Office 365 as an option from the drop-down list.
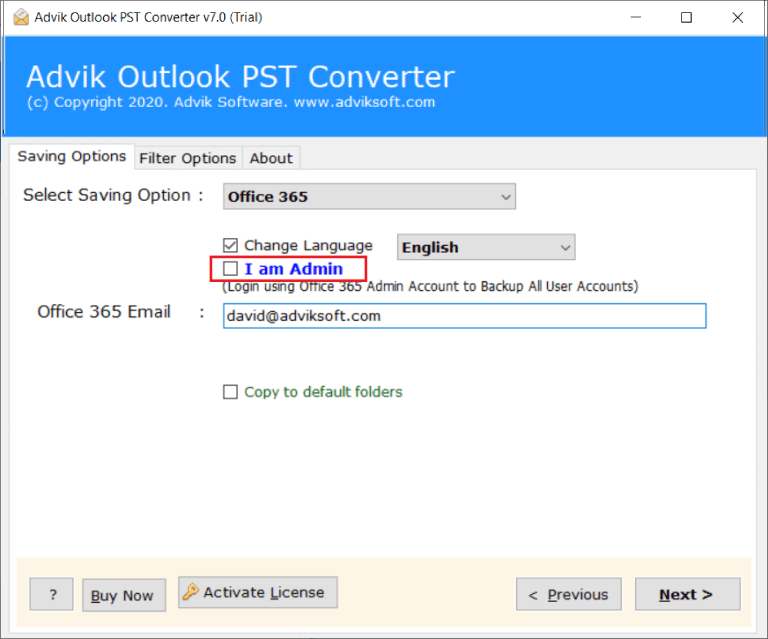
5. Thereafter, enter your Office 365 account credentials and click on the Convert button.
6. Then, a tab from Microsoft will appear on your screen where you need to enter your Office 365 password and click on the Sign in button.
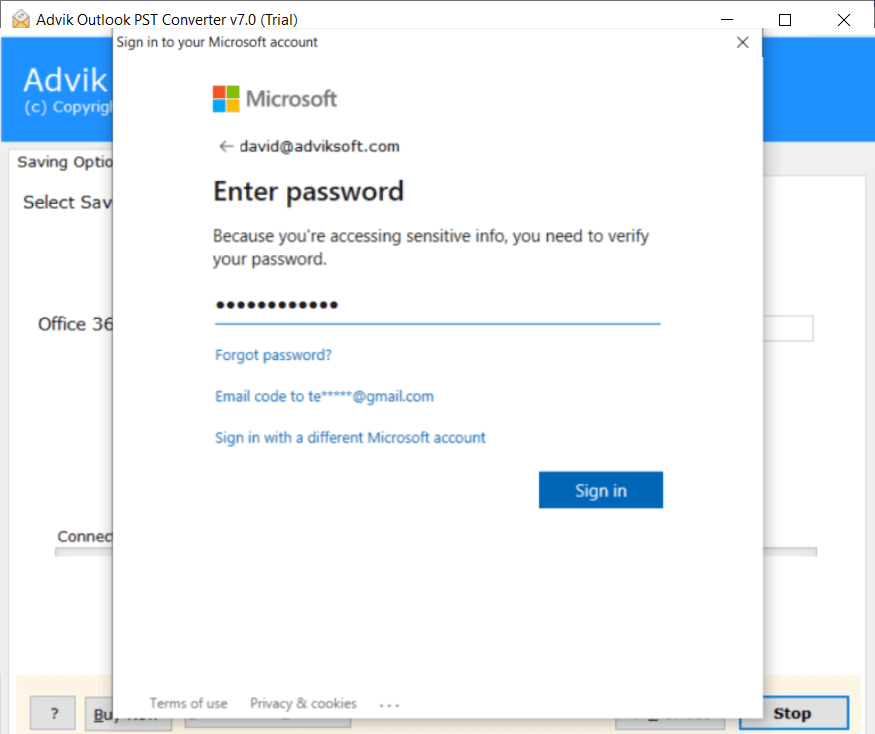
The migration process will start immediately and you can login to your Office 365 account and check all of the exported PST files into it.
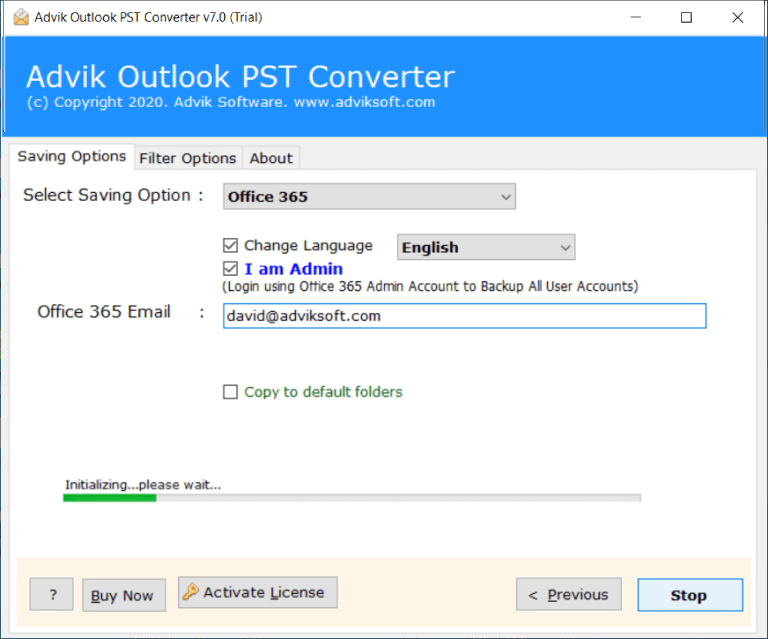
Here complete the process, you can read PST emails in your Office 365 account without any hassle. Some of the highlighted features of the tool are –
- Support PST file from all Outlook editions.
- Upload corrupted, password-protected or damaged PST file.
- Allow to open single or multiple PST file in Office 365.
- Email filter options to open selective emails only.
- It also import PST contacts to Office 365 Account without any issues.
- It works seamlessly with Windows 11, 10, 8.1, 8, 7 etc.
Watch How to Open PST File in Office 365
Final Words
Here in this blog we discuss two easy ways to open PST emails in Microsoft 365 without any hassle. These methods are very simple and make the process easy for you. Now you can decide which given solution you want to opt for and complete the process. Hope this article will be helpful for you.

